
Integrate Google reCaptcha into your Nuxt.js project.

A fullstack software engineer. I have years of experience working in the E-commerce, Educational Technology and Aviation industries. I am mostly familiar with the following tools: JavaScript, TypeScript, Vue, React, Node.js, MySQL, Postgres, MongoDB. I have also in the past, played a little with React Native, Firebase, Ruby and I am currently looking to level up my Java skills. In my free time, I enjoy music, football (soccer), table tennis, badminton and weightlifting.
In case you want to dive straight into the code, the link to the GitHub repo of this demo can be found here.
Introduction
We've all been there. You're surfing one of your favorite sites and you fill a form. But just as you click the submit button, you see a dialog box asking if you're human. You - sometimes - get a set of blurry images and you're asked to select which of them contains a bus, traffic light, or something else.
This is a scenario I'm sure many of us can relate to. You think about it and wonder: since it leads to such a terrible user experience, why do many websites still use it?
The case for reCaptcha.
The word captcha is actually an acronym that stands for ‘completely automated public Turing test to tell computers and humans apart’.
According to the official docs, reCaptcha is a free service from Google that helps protect websites from spam and abuse. By adding reCaptcha to a site, you can block automated software while helping your welcome users to enter with ease.
Now that you know why reCaptcha is needed on your website, let's get started on implementing it into our project.
I'm assuming you have a Google account, basic knowledge of Nuxt.js, and a Nuxt project already created. If you don't, you can go to the docs to learn how to get started.
We'll be using version 3 of Google reCaptcha for this demo. Version 3 does the user verification in the background. Meaning your user will most likely never have to pass through the "are you a robot check". If you want more information about version 3, you can click here.
The first thing we need to do is to generate our site key and secret key. To do that, we need to create our reCaptcha instance by visiting this link. You will need a google account for this.
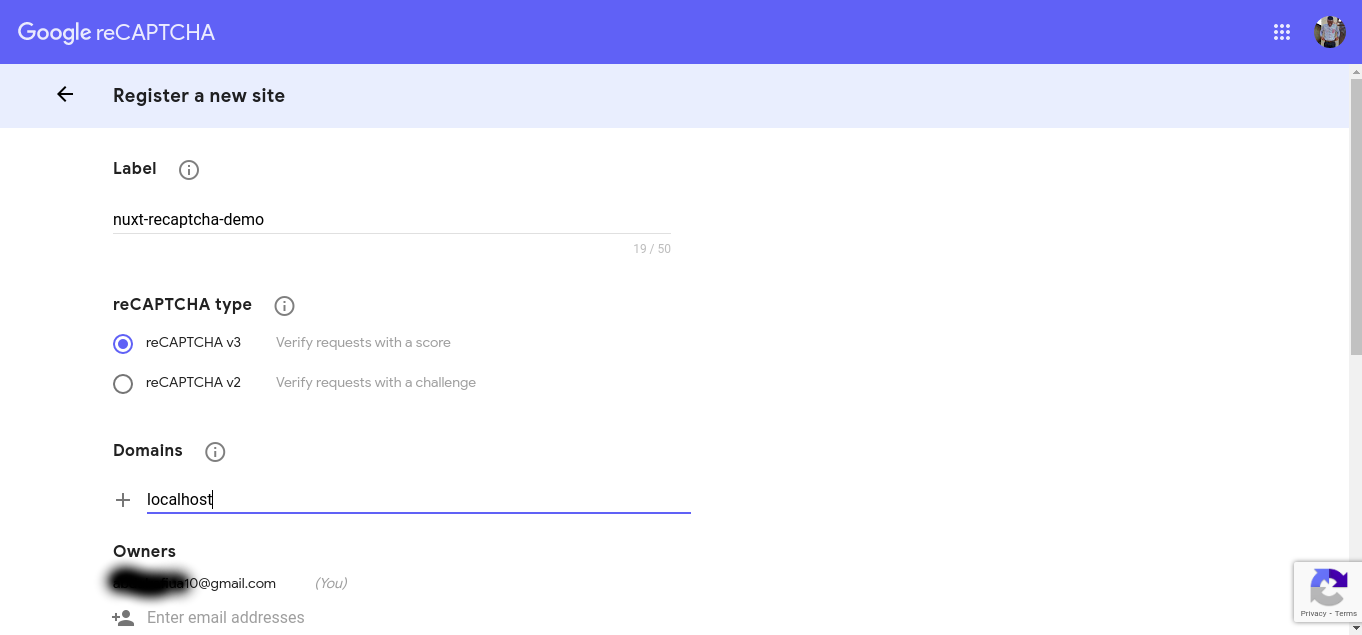
- You can enter anything as your label;
- Choose reCaptcha v3 as reCaptcha type;
- Enter your domain. Since we'll be running this demo on our local machine, enter localhost as the domain;
- Enter your email address in the owners' field;
- Accept the terms and conditions and click register.
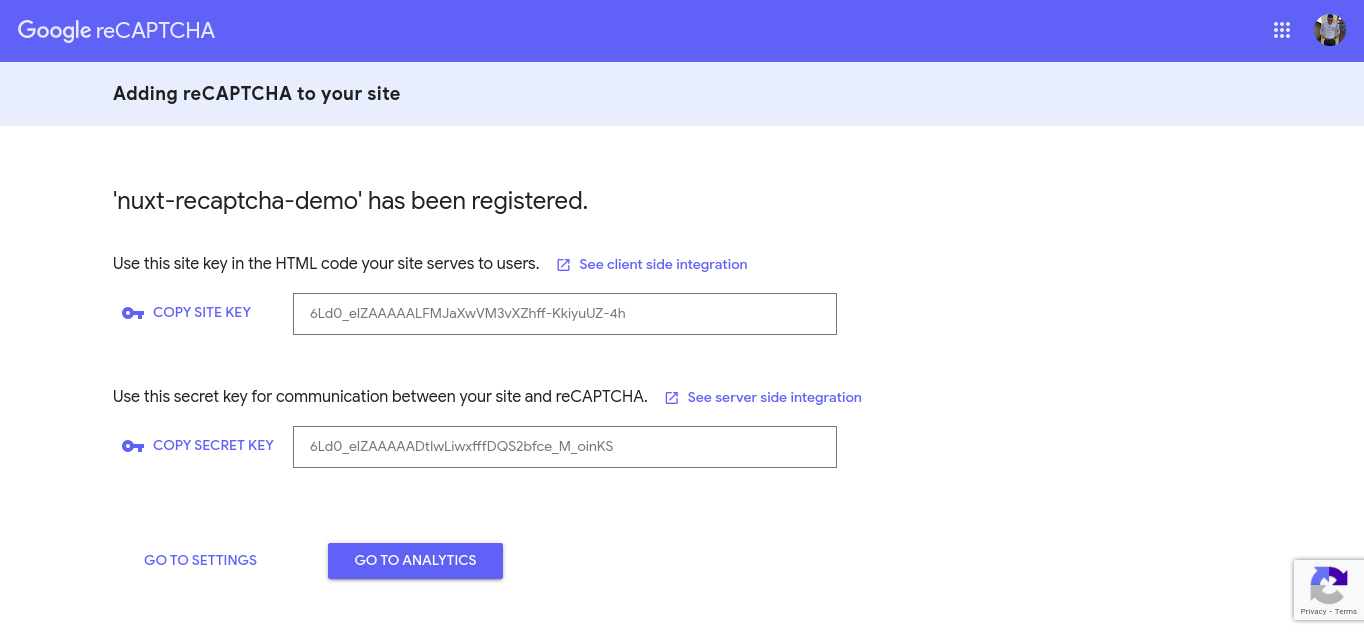
On the next page, you'll see your site key and secret key. Copy them into somewhere safe.
Next, Install the nuxtjs recaptcha and dotenv modules by running yarn add @nuxtjs/recaptcha @nuxtjs/dotenv or npm install @nuxtjs/recaptcha @nuxtjs/dotenv. The dotenv module will be used to store our site and secret keys because we don't want to expose it on the client side.
Add @nuxtjs/recaptcha and @nuxtjs/dotenv to the modules section of your nuxt.config.js file. For more reCaptcha configuration options, check the reCaptcha module docs.
modules: [
    "@nuxtjs/dotenv",
    [
       "@nuxtjs/recaptcha",
      {
        siteKey: process.env.SITE_KEY,
      }
    ]
]
Create a .env file in the root of your project and add your site and secret keys.
SITE_KEY=6Ld0_eIZAAAAALFMJaXwVM3vXZhff-KkiyuUZ-4h
SECRET_KEY=6Ld0_eIZAAAAADtIwLiwxfffDQS2bfce_M_oinKS
We are going to build a simple contact us form and integrate it with reCaptcha. Add the following piece of code to your index.vue file.
<template>
  <div class="container">
    <div class="contact-form">
      <h2>Contact Us</h2>

      <form @submit.prevent="onSubmit">
        <input
          autocomplete="off"
          placeholder="Email"
          type="email"
          v-model="email"
        />

        <input
          autocomplete="off"
          placeholder="Phone number"
          type="text"
          v-model="phoneNumber"
        />

        <textarea
          autocomplete="off"
          placeholder="Enter your message"
          type="text"
          v-model="message"
          rows="4"
        />

        <button type="submit" v-if="!loading">Send Message</button>

        <p v-else>Loading...</p>
      </form>

      <div class="message" v-if="notificationMessage">
        <p class="notification-text" :style="errorStatus ? 'color: red;' : ''">
          {{ notificationMessage }}
        </p>
      </div>
    </div>
  </div>
</template>

<script>
export default {
  async mounted() {
    // Initialize recaptcha instance
    try {
      await this.$recaptcha.init();
    } catch (e) {
      console.log(e);
    }
  },
  data() {
    return {
      email: "",
      phoneNumber: "",
      message: "",
      notificationMessage: "",
      errorStatus: false,
      loading: false
    };
  },
  watch: {
    notificationMessage(newValue) {
      // check if the new notification message is not of a truthy value
      if (!Boolean(newValue)) return;

      // Clear notification message after 5 seconds
      const context = this;
      setTimeout(() => {
        context.notificationMessage = "";
      }, 5000);
    }
  },
  methods: {
    async onSubmit() {
      try {
        this.loading = true;

        // Start the verification process
        const response = await this.verifyCaptcha();

        // Display error message if verification was not successful
        if (!response.success) {
          this.$recaptcha.reset();
          this.loading = false;
          this.errorStatus = true;
          this.notificationMessage =
            "There was an error with your reCaptcha verification. Please try again.";
          return;
        }

        // If verification was successful, send the message
        await this.sendMessage();

        this.errorStatus = false;
        this.notificationMessage =
          "Thank you for reaching out. We will get back to you as soon as possible";

        this.loading = false;
        this.$recaptcha.reset();
      } catch (error) {
        this.loading = false;
        console.log(error);
      }
    },
    async verifyCaptcha() {
      try {
        const token = await this.$recaptcha.execute();

        const response = await this.$axios.$post(
          `https://www.google.com/recaptcha/api/siteverify?secret=${process.env.SECRET_KEY}&response=${token}`
        );

        return response;
      } catch (error) {
        this.loading = false;
        return error;
      }
    },
    async sendMessage() {
      // The send message logic goes in here
    }
  }
};
</script>
When the "Send Message" button is clicked, the onSubmit function is called. In the verifyCaptcha function, we call the execute method on the recaptcha instance to start the user verification process. If the user is confirmed as human, the verification is successful without the need for any test to come up. If reCaptcha suspects foul play, however, an extra check will be performed and the user will be asked to complete a challenge to prove they're human.
A token will be returned which will need to be verified to prove its authenticity. You can do that on the server side if you wish but in this case, we'll be performing that check on the client side.
A POST request will be made to this API https://www.google.com/recaptcha/api/siteverify with the token and secret key passed as query parameters. The response will come in this format:
{
  "success": true | false,
  "challenge_ts": timestamp,
  "hostname": string,
  "error-codes": [...]        // optional
}
In case you get a CORS error when making the post request, install the @nuxtjs/proxy module by running yarn add @nuxtjs/proxy or npm install @nuxtjs/proxy. Add @nuxtjs/proxy to the modules array in your nuxt.config.js file. Configure the proxy by adding the following lines of code to the file as well.
 axios: {
    proxy: true
 },
 proxy: {
   "/captcha-api/": {
     target: "https://www.google.com/recaptcha/api",
     pathRewrite: {
       "^/captcha-api": ""
     }
   }
 },
The verifyCaptcha method will need a little tweak to reflect the changes in the nuxt.config.js file.
    async verifyCaptcha() {
      try {
        const token = await this.$recaptcha.execute();
        const response = await this.$axios.$post(
          `/captcha-api/siteverify?secret=${process.env.SECRET_KEY}&response=${token}`
        );

        return response;
      } catch (error) {
        this.loading = false;
        return error;
      }
    },
Conclusion
If the success parameter returns true, it means the user is successfully verified and we can then perform our sendMessage logic.
Don't forget to call the reset method on the recaptcha instance in case there was an error and we want to re-verify the user. The reason being that reCaptcha tokens can be used for verification only once.
If you miss anything and want to view the full code, the Github repo can be found here. If you have any questions, comments, corrections, or suggestions, please leave them in the comments section below.
You can follow me on Twitter or connect with me on LinkedIn if you want to reach out.


